I am using PISCSI on my AKAI S3000XL and S2000 samplers. My Raspberries cannot boot from some "cheap" 512GB Chinese cards, so I decided to use some older SD cards for the Raspberry to run on (I have some old 4, 8, or 16GB cards) and add a new 512GB SD card as an external drive mounted on the Raspberry to use as a repository for the CD Images.
You can use an additional SD card inserted in a USB reader, or use a pendrive directly.
Here's a tutorial on how to do it.
1) log in to your piscsi or ssh into it by:
sudo ssh pi@piscsi
2) you first need to determine all available drives on the RPI, you can use the fdisk command:
sudo fdisk -l
this will output a list of drives/partitions, you need to understand which one is the external pendrive or SD card you attached to the RPI.
usually, this will be /dev/sda1, but this could vary...something like this:
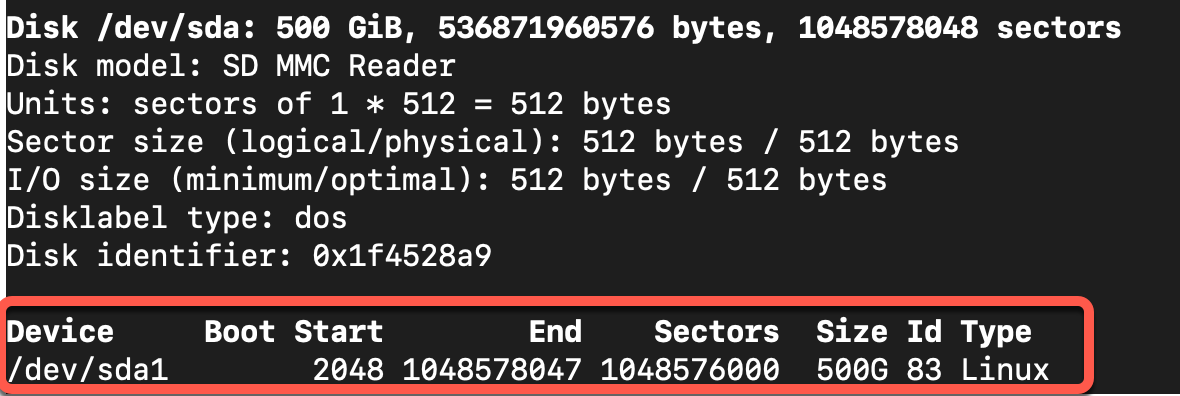
in my case I have a 512 SD card in an USB reader, on the RPI it is shown as /dev/sda1
3) you need to format the partition and create a primary partition, so type:
sudo fdisk /dev/sda ----->NOTE: without the 1 at the end!
followed by commands n (new), p (primary), 1 (1st partition), ENTER, ENTER, w (write the new table)
(if you already had partitions you should delete them with the "d" command, or simply re-use them)
Note: in my case ext4 filesystem didn't work, I had to format as ext2.
in that case:
sudo mkfs -t ext2 /dev/sda1
3) you will then need to create your new folder on the RPI and mount it to the partition you just created. I called my new folder "isoimages", but of course you can change it to anything you want. Type:
sudo mkdir isoimages
followed by
sudo mount /dev/sda1 isoimages
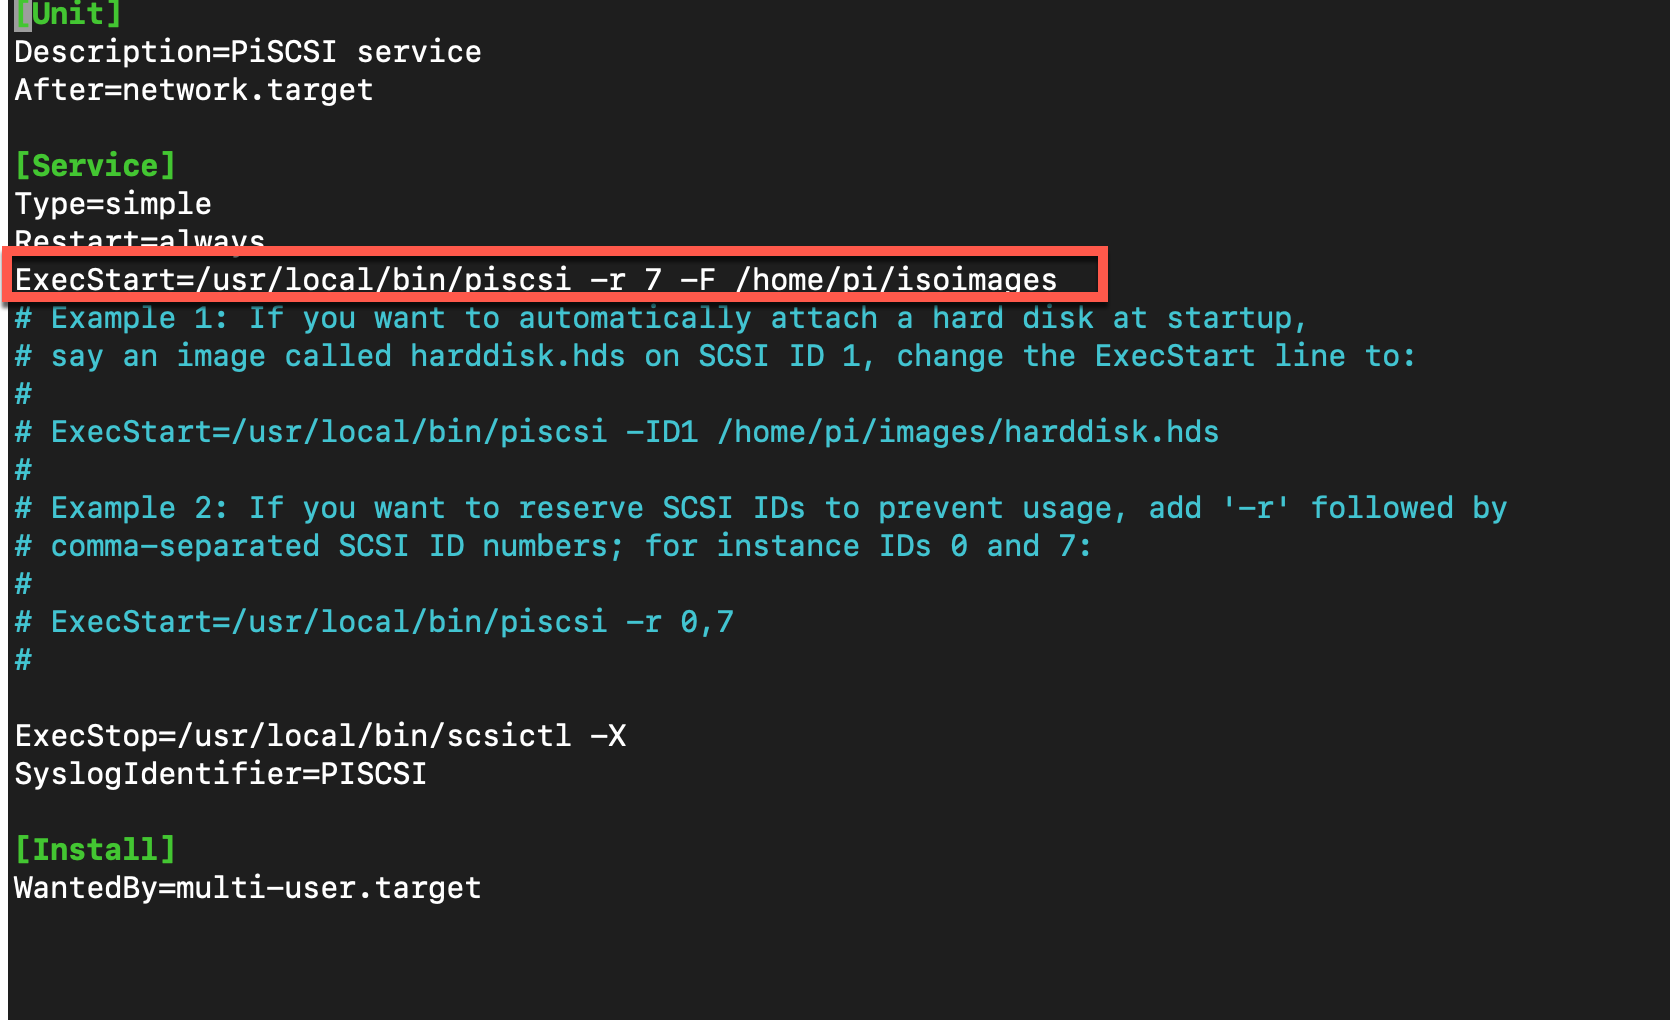
4) you then need to edit the piscsi.service file with a new path, "isoimages" instead of the standard "images" folder.
sudo nano /etc/systemd/system/piscsi.service
and edit the line with ExecStart like this:
ExecStart=/usr/local/bin/piscsi -r 7 -F /home/pi/isoimages
This will tell the PISCSI service to start from your new foleer, which is now mounted on you external SD card or pendrive
5) you will now need to permanently mount /dev/sda1 on the new isoimages folder (you don't want to manually load the folder each time...).
You need to find the "Partition ID" and "Type" of /dev/sda1 first
sudo blkid /dev/sda1
and simply copy the PARTUUID and TYPE from the output into any text editor (you will need it later)

6) you will then need to edit the fstab file, which contains all mounted drives. This will instruct the raspberry to automatically mount the SD/Pendrive at startup. Type:
sudo nano /etc/fstabadd a new line with your PARTUUID and TYPE as follows (change the values to reflect your actual values)
PARTUUID=1f4528a9-01 /home/pi/isoimages ext2 defaults,auto,users,rw,nofail,noatime 0 0

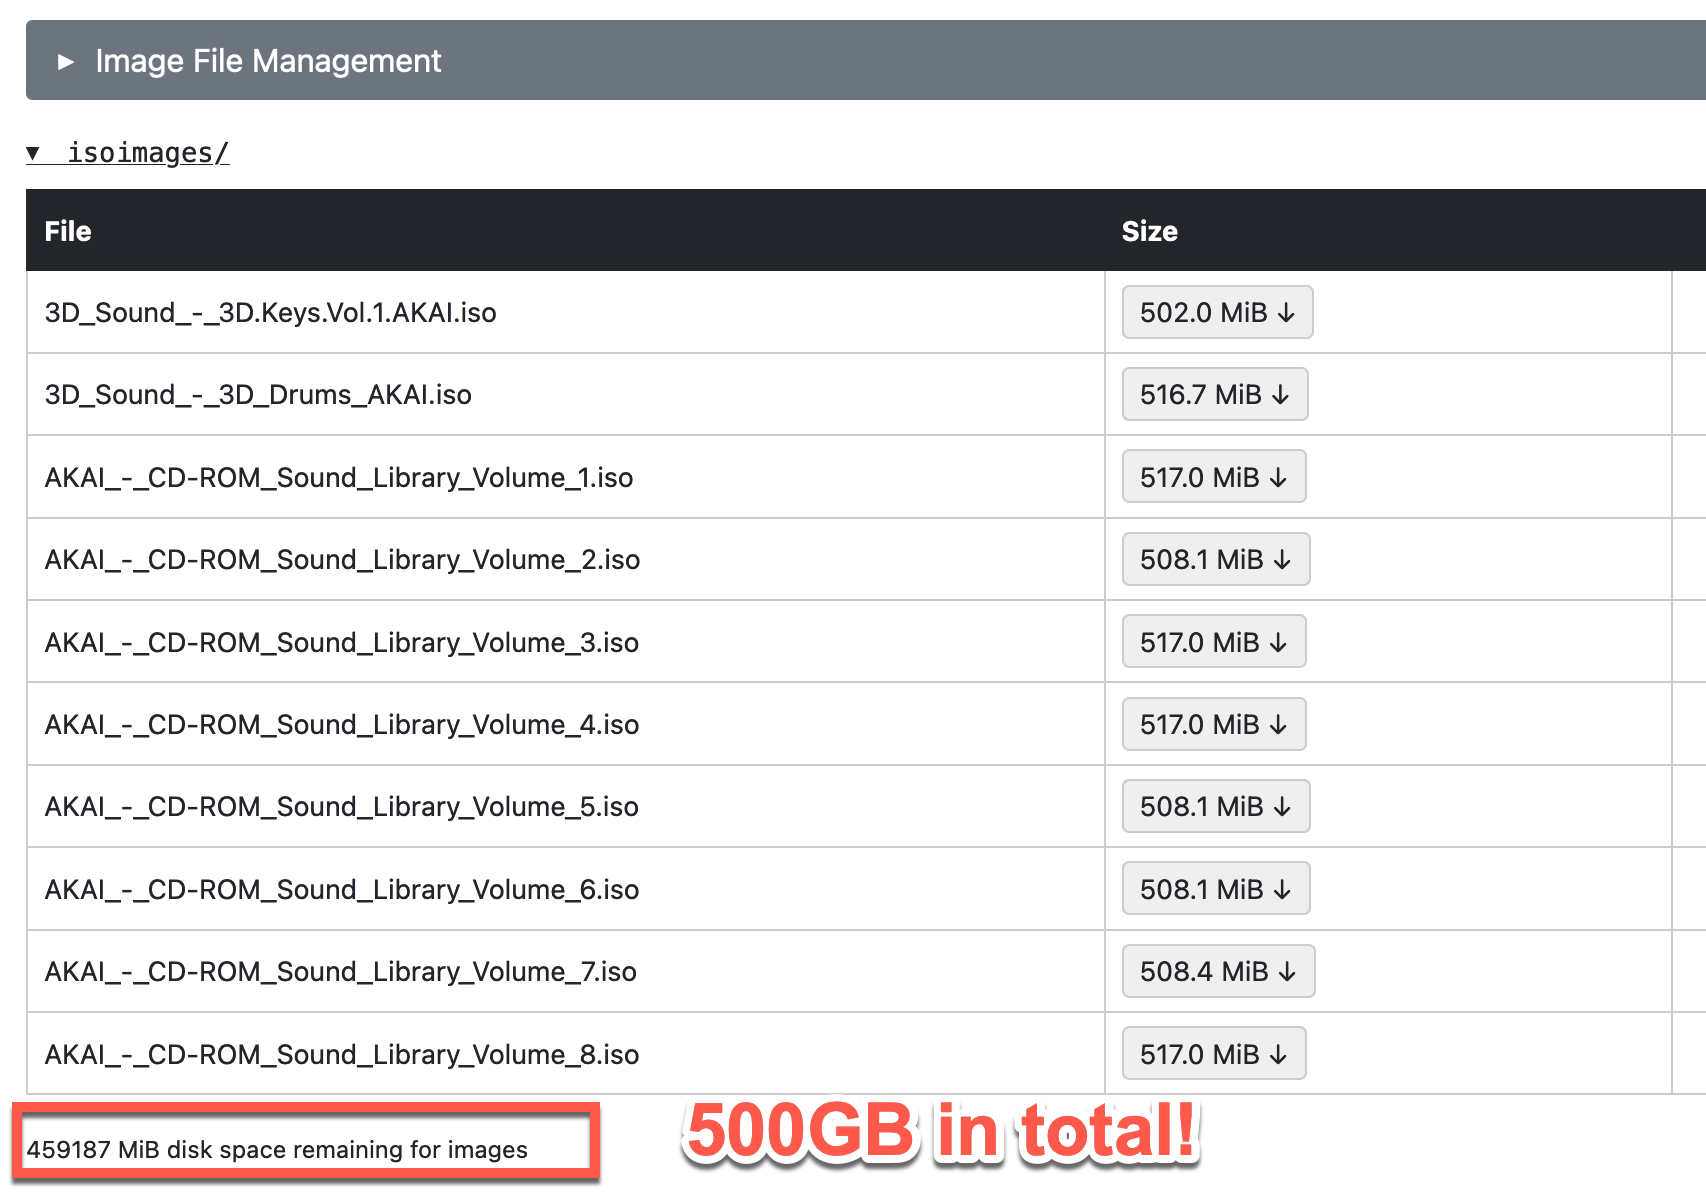
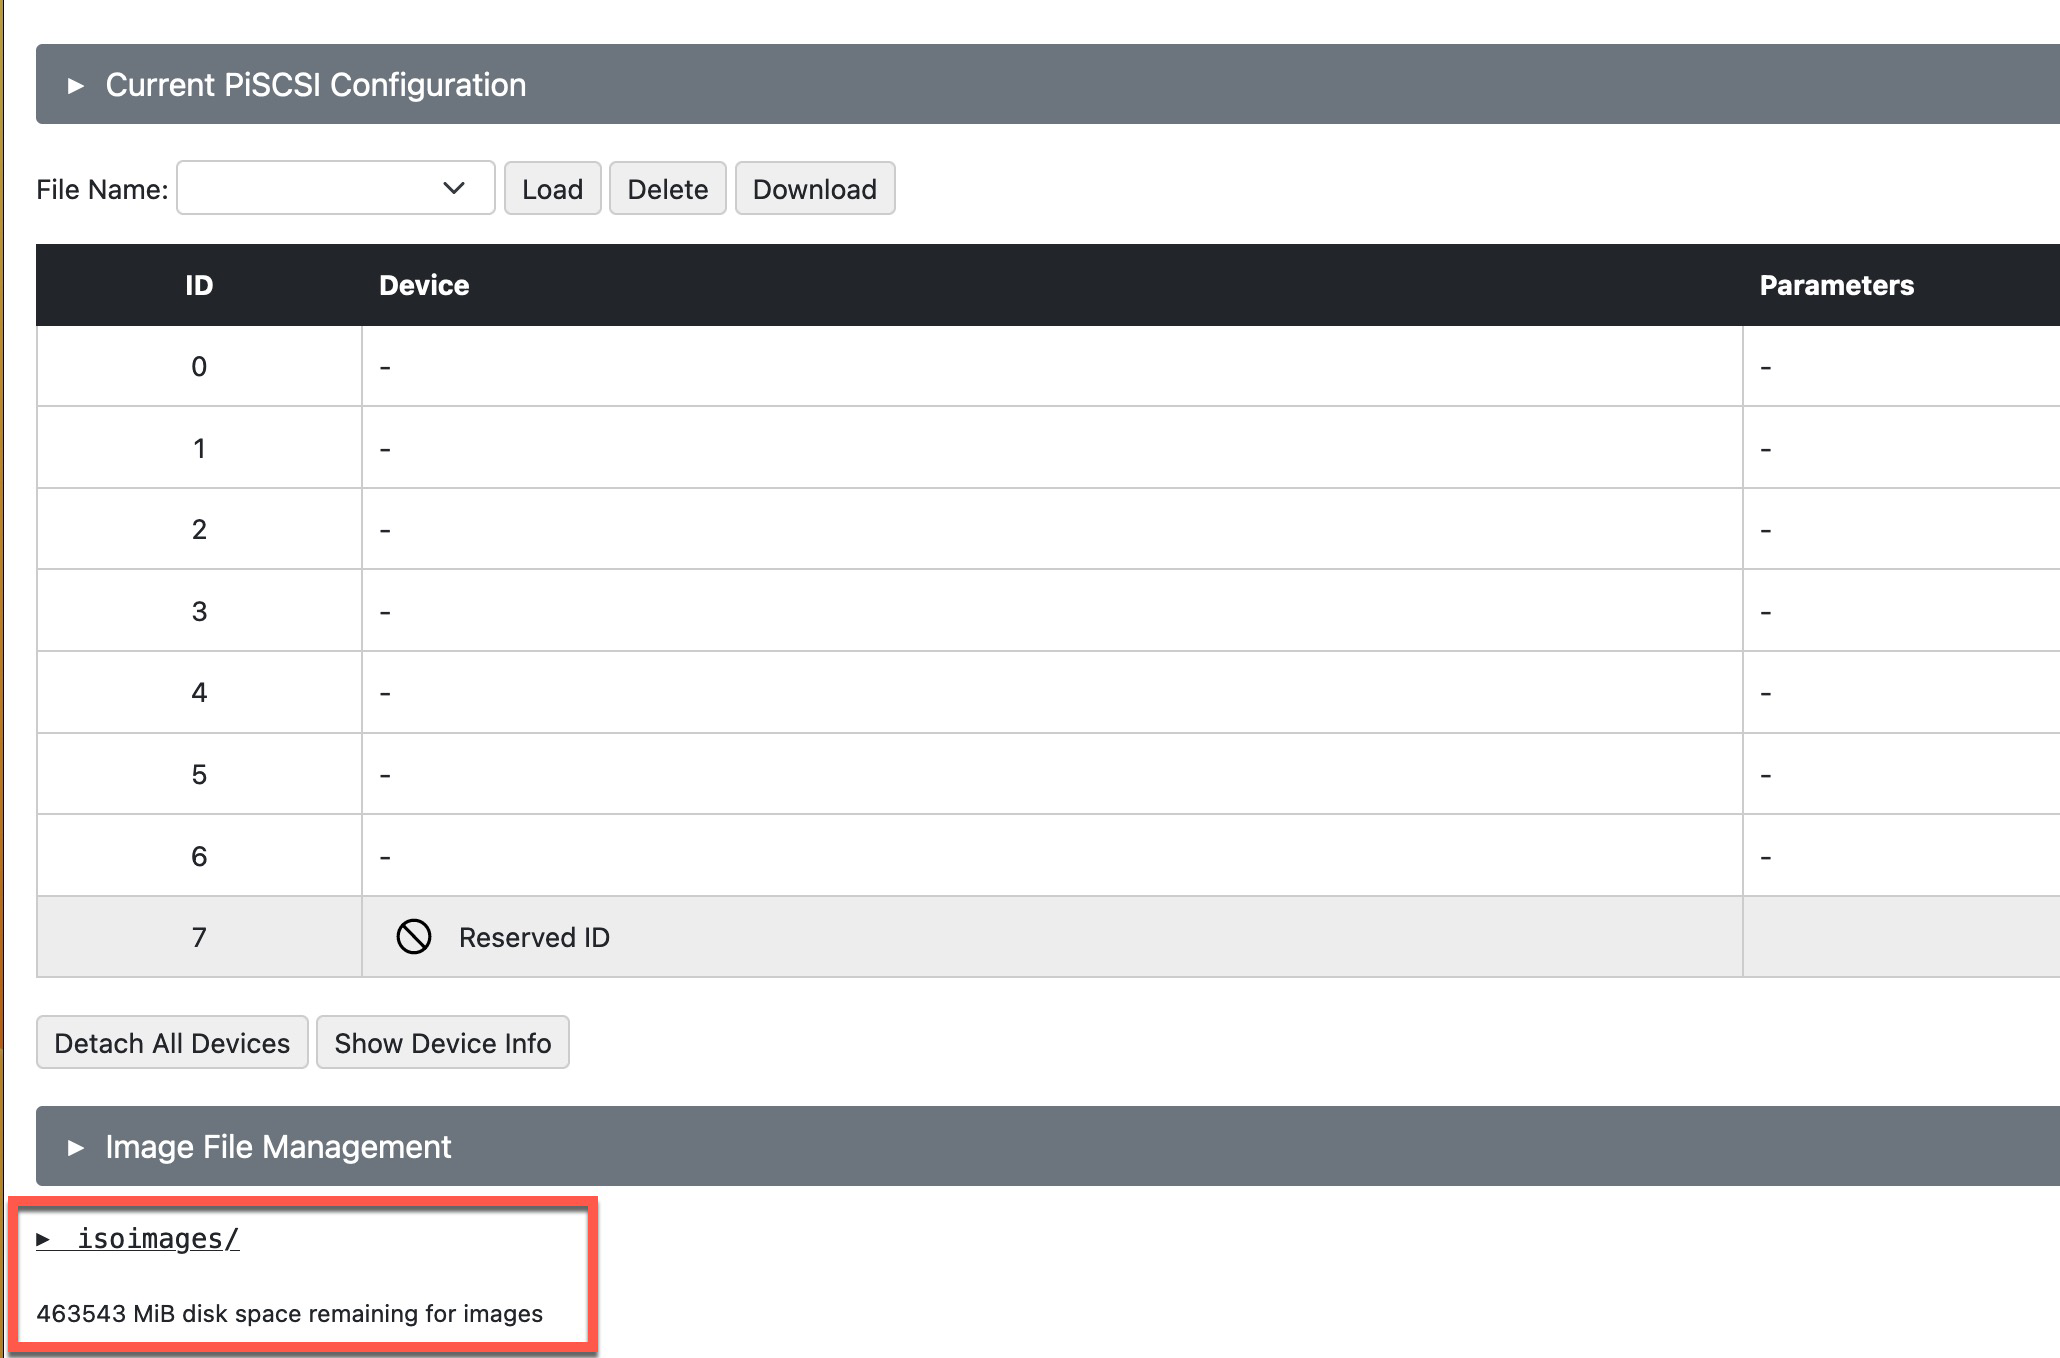
7) that's it. Reboot your RPI and at next startup it will mount the SD card and all your CD images will be stored there, you can check it in the Web Interface how much free space you have left, someting like this: